
About
The Story Collecting Kit includes a recording device, storage, and accessories to easily capture high-quality audio interviews for oral history projects, enabling the preservation of personal narratives, institutional memories, and community histories.
These kits are funded by the New Jersey State Library through its initiative “REV 250: Examining the Semiquincentennial through a Jersey Lens” and presented in partnership with the New Jersey Council for the Humanities.
Parts
The Story Collecting Kit (Replacement Cost: $320 + $15 processing fee)
- Carrying Case ($22)
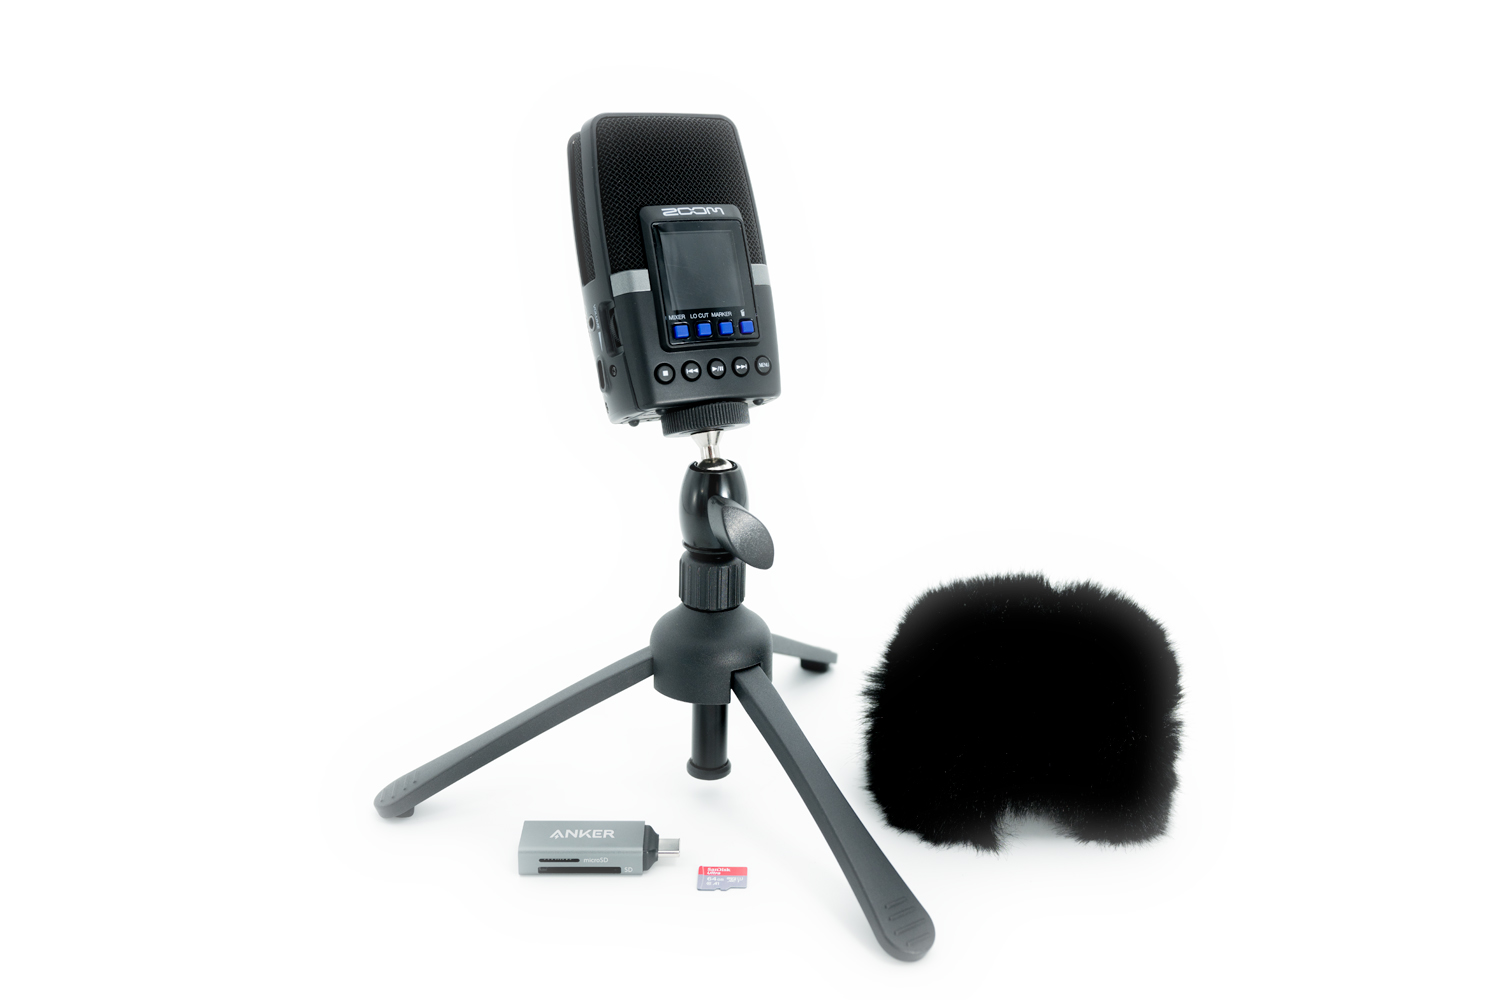
- Zoom Recorder ($180)
- Tripod ($30)
- USB-C Cable ($15)
- AC Adapter ($15)
- Hairy Windscreen ($20)
- Micro SD Card + Clear Case ($16)
- Micro SD Card Reader ($20)
- (2) AA Batteries ($1)
- (2) Clear Zipper Pouches ($1)
Instructions
Setting up and using the Zoom Recorder
-
- Batteries: Remove the battery cover, located on the back of the recorder, and place the 2 AA batteries into the device. Re-cover.
- USB-AC Power Adapter & Cord: If you are recording near a power source, it is recommended to power the recorder by the power cord along with the batteries, as backup, so that in the case of a power failure during a story collection, the recording will not be affected.
- SD Card: On the base of the recorder, lift the “micro-sd xc” cover and push the SD card into the slot until it clicks. Re-cover. (Tip: Hold the recorder upside-down, with the screen facing away from you, and hold the SD card with the red/grey side facing toward you to insert).
- Power On & Off: Slide and hold the power switch located on the side of the recorder until the display screen illuminates. Slide and hold the power switch again to turn the recorder off.
- Screen Setup: Navigate and set the options on the screen. The screen will indicate which blue buttons to select to perform a specific action (back, up, down, select)
- Guide Sound
- Language
- Date Format
- Set Date/Time: Select “enter” to access the + and – signs for changing the day/month/year/time.
- Battery Type: Leave as the default (alkaline).
- Tripod: Attach the tripod at the base of the recorder.
Troubleshooting
- Microphone Direction Setting: Use the Front and Rear buttons at the top of the recorder to select which set of microphones (front, rear, or both) you want to record with.
- Microphone Pickup Setting: Use the 120, 90, or MONO settings to select the pickup.
-
-
- Mono: Use this setting to record a targeted sound directly in front of the recording device while suppressing sounds from the sides.
- 90 & 120 degrees: Use these settings to record stereo sound.
-
- Recording: Start recording by pressing the button with the red dot on the top of the recorder. Press the button a second time to stop the recording and save the file. TROUBLESHOOTING NOTE: In order to begin recording, you must have already selected your microphone direction setting. If you receive a “No Rec Tracks!” error message, this is an indication that you have not selected your microphone direction setting.
- Playback: Press the Play/Pause button on the front of the recorder to start listening to the last recorded file. Use the directional buttons to navigate between files.
Access the H2 essentials Operation Manual for additional information and recorder features.
Transferring sound files from the Zoom Recorder to a computer or smartphone
- Remove the micro SD card from the recorder. By pressing down on the micro SD card, it will pop up for easy removal.
- Slide the micro SD card into the “microSD” slot on the SD card reader. [The SD card reader looks like a flash drive device.]
- Connect the reader to your device (computer or smartphone).
- Access the card’s contents through your device’s file manager. The default file format is WAV.
- Move your sound file folder to your local drive. It is critical to make sure your file is saved locally before moving to the next step.
- Delete your sound folder from the Zoom_H2E folder.
- When finished, safely eject the reader before physically removing it from your computer or smartphone device.
Re-packing the story collecting kit
- Detach the Zoom recorder from the tripod.
- Remove batteries from the Zoom Recorder and place them in the clear zipper pouch labeled “2 AA Batteries.”
It is critical to remove batteries from the recorder before re-packing the kit. Leaving batteries in the recorder can damage the recorder. - Remove the micro SD card from the card reader and place it in the square-shaped case labeled “Micro SD Card.”
- Place the Micro SD case and the card reader inside the clear zipper pouch labeled “Micro SD Card + Card Reader.”
- Place both clear zipper pouches inside the mesh pocket of the carrying case.
- Place each piece of equipment in the appropriate location in the carrying case before zipping closed.
Upon return of this kit, library staff will review the SD card to ensure that all content has been deleted from the card prior to the kit being available for checkout.
Ideas for Use
- Capture personal experiences of your family, friends, and fellow community members, and preserve them for the future. Our Guide to Genealogy and Family History contains a variety of resources to get you started.
- Explore opportunities for participating in the collection of Princetonians’ stories as part of the Voices of Princeton oral history initiative by visit www.voicesofprinceton.org.
- Record a podcast. Learn more about producing podcasts with LinkedIn Learning Courses.